
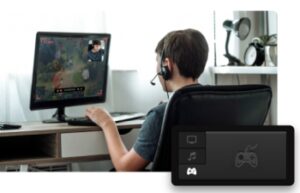
 In the world of gaming, capturing and sharing epic moments has become a popular trend. Whether you want to create engaging content for your YouTube channel or simply preserve memorable gaming experiences, recording gameplay footage is essential.
NVIDIA Screen Recorder and iTop Screen Recorder are powerful tools that enable gamers to capture high-quality gameplay effortlessly. In this article, we will guide you through the process of using both tools to record your games like a pro.
Why Record Screen with NVIDIA Screen Recorder for Game?
Recording your gameplay with NVIDIA Screen Recorder offers numerous advantages:
♦ High-quality recording: NVIDIA Screen Recorder ensures crisp and clear video output, preserving the details and visual fidelity of your game.
♦ Performance optimization: The software is optimized to have minimal impact on your gaming experience, ensuring smooth gameplay while recording.
♦ GPU compatibility: NVIDIA Screen Recorder is designed to work seamlessly with NVIDIA GeForce GTX 600 series or newer GPUs, leveraging their power for efficient recording.
How to Record Gameplay with NVIDIA Share Screen Recorder?
To record gameplay using NVIDIA Share Screen Recorder, follow these steps:
Step 1: Launch GeForce Experience
Open the GeForce Experience application on your computer. If it’s not installed, visit the official NVIDIA website to download and install the latest version.
Step 2: Access NVIDIA Share Screen Recorder
Within GeForce Experience, locate the “Share” button or overlay, usually found in the top right corner. Click on it to open the Share overlay.
Step 3: Select Recording Settings
In the Share overlay, navigate to the “Settings” tab. Here, you can adjust various recording settings, including video quality, resolution, frame rate, and audio input.
Step 4: Choose a Game to Record
Return to the Share overlay and click on the “Instant Replay” or “Record” button, depending on your desired recording mode. Select the game you want to record from the list of running applications.
Step 5: Start and Stop Recording
Once you’ve chosen the game, click on the “Start” button to begin recording. To stop recording, click on the corresponding button or use the hotkey shortcut configured in the Share overlay settings.
iTop Screen Recorder: A Free Screen Recorder to Capture Everything on the Screen
In addition to NVIDIA Screen Recorder, iTop Screen Recorder is an excellent alternative that offers flexibility beyond gaming:
♦ Free availability: iTop Screen Recorder is free software that allows users to record their screen activities without any cost.
♦ Compatibility: iTop Screen Recorder is compatible with various GPUs, providing users with a versatile recording solution.
♦ Versatile screen recording: iTop Screen Recorder allows capturing any screen activity, making it suitable for tutorials, presentations, gameplay recording, and more.
How to Use iTop Screen Recorder to Record Gameplay
To use iTop Screen Recorder for recording gameplay, follow these steps:
Step 1: Download and Install iTop Screen Recorder
Visit the official iTop Screen Recorder website and download the software. Follow the installation instructions to set it up on your computer.
Step 2: Configure Recording Settings
Launch iTop Screen Recorder and adjust the recording settings, such as video format, audio input, and output folder.
Step 3: Select Recording Area
Choose the area of the screen you want to record. iTop Screen Recorder provides options for full-screen recording, custom area selection, and even the ability to capture webcam footage simultaneously.
Step 4: Start and Stop Recording
Once you’ve configured the settings and selected the recording area, click on the “Record” button to start the recording. To stop the recording, either click on the “Stop” button.
You can see that it’s as easy as ABC to record gameplay with iTop Screen Recorder. The best part is they also offer a screen recorder online for those who don’t want to install additional software on their computers.
The Bottom Line
Recording gameplay is an exciting and essential aspect of the gaming experience, allowing you to preserve and share your best moments. NVIDIA Screen Recorder and iTop Screen Recorder are both powerful tools that can help you achieve high-quality recordings effortlessly. By using NVIDIA Screen Recorder, you can take advantage of its optimized performance, GPU compatibility, and excellent video quality. iTop Screen Recorder, on the other hand, offers versatility beyond gaming, enabling you to capture various screen activities for tutorials, presentations, and more.
Both tools provide valuable options and features, allowing you to customize your recordings according to your preferences. Whether you choose NVIDIA Screen Recorder or iTop Screen Recorder, it’s important to explore their settings and experiment to find the ideal configuration for your needs.
Remember to consider factors such as video quality, resolution, frame rate, and audio input to ensure optimal results. Additionally, take advantage of editing options available in the respective software to enhance and refine your gameplay recordings.
Shift Frequency © 2023 – Using NVIDIA Screen Recorder
and iTop Screen Recorder for Gaming